Tech Reflect is a platform for Digital & Web Services technicians to look-back on a particular project and share their experiences, thoughts, and lessons learned.
By Austen Villacis, Digital Imaging Technician
Occasionally, requests will come in from Texas State faculty for special projects. One such request came from Dr. Erina Duganne, an Associate Professor of Art History in the College of Art and Design, and included a collection of 5 personal notebooks from art critic Lucy Lippard. The notebooks date from 1983 to 1984, and range in size, the largest being 4″x6″ inches.
After meeting with Dr. Duganne to examine the materials in-person and discuss the goals for the project, the first step was to build a capture station with the following things in mind:
Quality: Dr. Duganne might use some of these images for an exhibit at Tufts University in 2020 and an accompanying exhibition catalog.
Efficiency: The total number of pages in the notebooks in over 1000, so it’s essential that the capture station is efficient.
Careful Handling: These nearly 40-year-old materials are on loan, not for the library to keep.
Versatility: The notebooks themselves vary in size, so I need the capture station to be versatile.
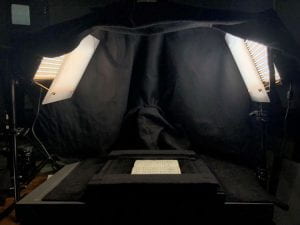
The base infrastructure for the capture station that I built along with Jeremy Moore, the Digital Media Specialist at the time, is a Sony A7R II with a NIKKOR 35-70mm zoom lens mounted to a Kaiser RSD copy stand and two GVM 29W LED light panels.
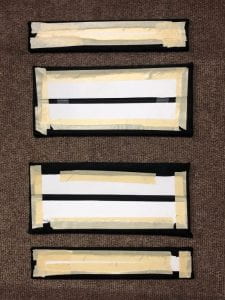
From there, I created custom supports on a pane of glass to flatten each spread evenly and consistently while protecting the notebooks from too much pressure. Duvetyne and foam core “clamps” were added to the top and bottom of the pane (so that I would not have to be worried about touching the glass each time I needed to lift it to turn a page or make adjustments). I placed each “clamp” atop Duvetyne and cut foam core making it possible to raise and lower the glass panel depending on how thick the object I photographed was.
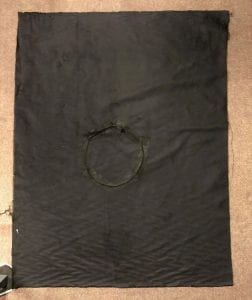
Next, to avoid unwanted reflections, I created a sort of “chandelier” using Duvetyne and wire.
For this project, I utilized tethered shooting so that I could see the images as I shot them to double-check for focus and dust issues. I used another monitor oriented vertically to see the camera’s “live view” and make slight adjustments to the composition in real-time.
From here, I was able to begin the digitization project itself. It took me about 10 minutes to deconstruct and construct the capture station each day I worked on the project. The first three notebooks took one day each to digitize, and the last two notebooks (4 and 5), I spread over two and three days respectively. Below are the raw shooting times for each of the notebooks:
Notebook 1: 2 hrs 18 mins
Notebook 2: 1 hr 47 mins
Notebook 3: 2 hrs
Notebook 4: 6 hrs 1 min
Notebook 5: 4 hrs 59 min
After shooting each book, I double-checked my photos against the physical book to make sure I had captured every page. If there was a page spread missing or otherwise unsatisfactory, I replaced it with a better one . This process took about 20 minutesper book for the first three and 40 minutes each for the last two.
After I made sure each page spread was present, it took me about an hour and a half to do an initial crop each of the first three. Notebook 4 took about 4 hours and 15 minutes to crop, and notebook 5 took 3hrs and 53 minutes to crop. The total time, then, to get each book entirely photographed and cropped was:
Notebook 1: 3hrs 58mins
Notebook 2: 3hrs 37mins
Notebook 3: 3 hrs 50mins
Notebook 4: 10hrs 56mins
Notebook 5: 9hrs 32mins
Next, I edited the images. My goal for this process was to maintain most of the integrity of the original object and also to make the handwritten text “pop,” i.e., set it apart from the text coming through from the page behind/beneath it.
Editing was done in Capture One 10 so that I could easily apply any settings to an entire notebook. I selected several images and used the clone variant function in Capture One to modify the white balance, brightness, and contrast and see how my edits were changing the image. In the end, I chose one of these variants and applied the settings from that variant to all the images in the notebook. For all five notebooks, the process took me about 2 and a half hours.
Finally, I did one last test against the physical copies to make sure all the images were present. From here, another technician produced PDFs and finished out the project.
Like other projects I’ve worked on, it required and was fundamentally about planning and execution. Collaborative digitization reinforces this; with multiple people working on the project, consistency is vital to avoid confusion and time lost due to errors.
Ideally, there’s always something of interest in every project, but this one was particularly exciting for me. First, as an art history major, I am familiar with Lucy Lippard, so it was fascinating to recognize artist names on the pages of the notebooks as I digitized them. Moreover, working with the objects made me curious about Lucy Lippard herself and resulted in several conversations with other technicians, and a few books checked out from Alkek


