Buck Winn (1 of 2): Creating a Coloring Page from a Photograph in Photoshop

In mid-March, we received a request to provide images for an exhibition on the work of the Texas artist and sculptor, Buck Winn, that exists on Texas State University’s campus. One of his works on the façade of Flowers Hall is a bas-relief sculpture with stained glass inset throughout. Originally the stained glass allowed light to shine into the stairwell on the interior of the building, however over the years the interior was altered, and the stained glass was filled in. Laura Kennedy, a University Archivist, wanted to create a coloring page to allow viewers of the exhibition to download the image and color in the stained-glass portions with their own interpretation. Getting a good image of the full artwork was challenging, since the façade of the building is tall and narrow, with trees and a staircase in front of it, and there’s no way to take a photograph of the building straight on.

I began by capturing an image of the entire mural, with as minimal interference from surrounding elements. I also had to consider time of day, to avoid interference from dark shadows or harsh sunlight.

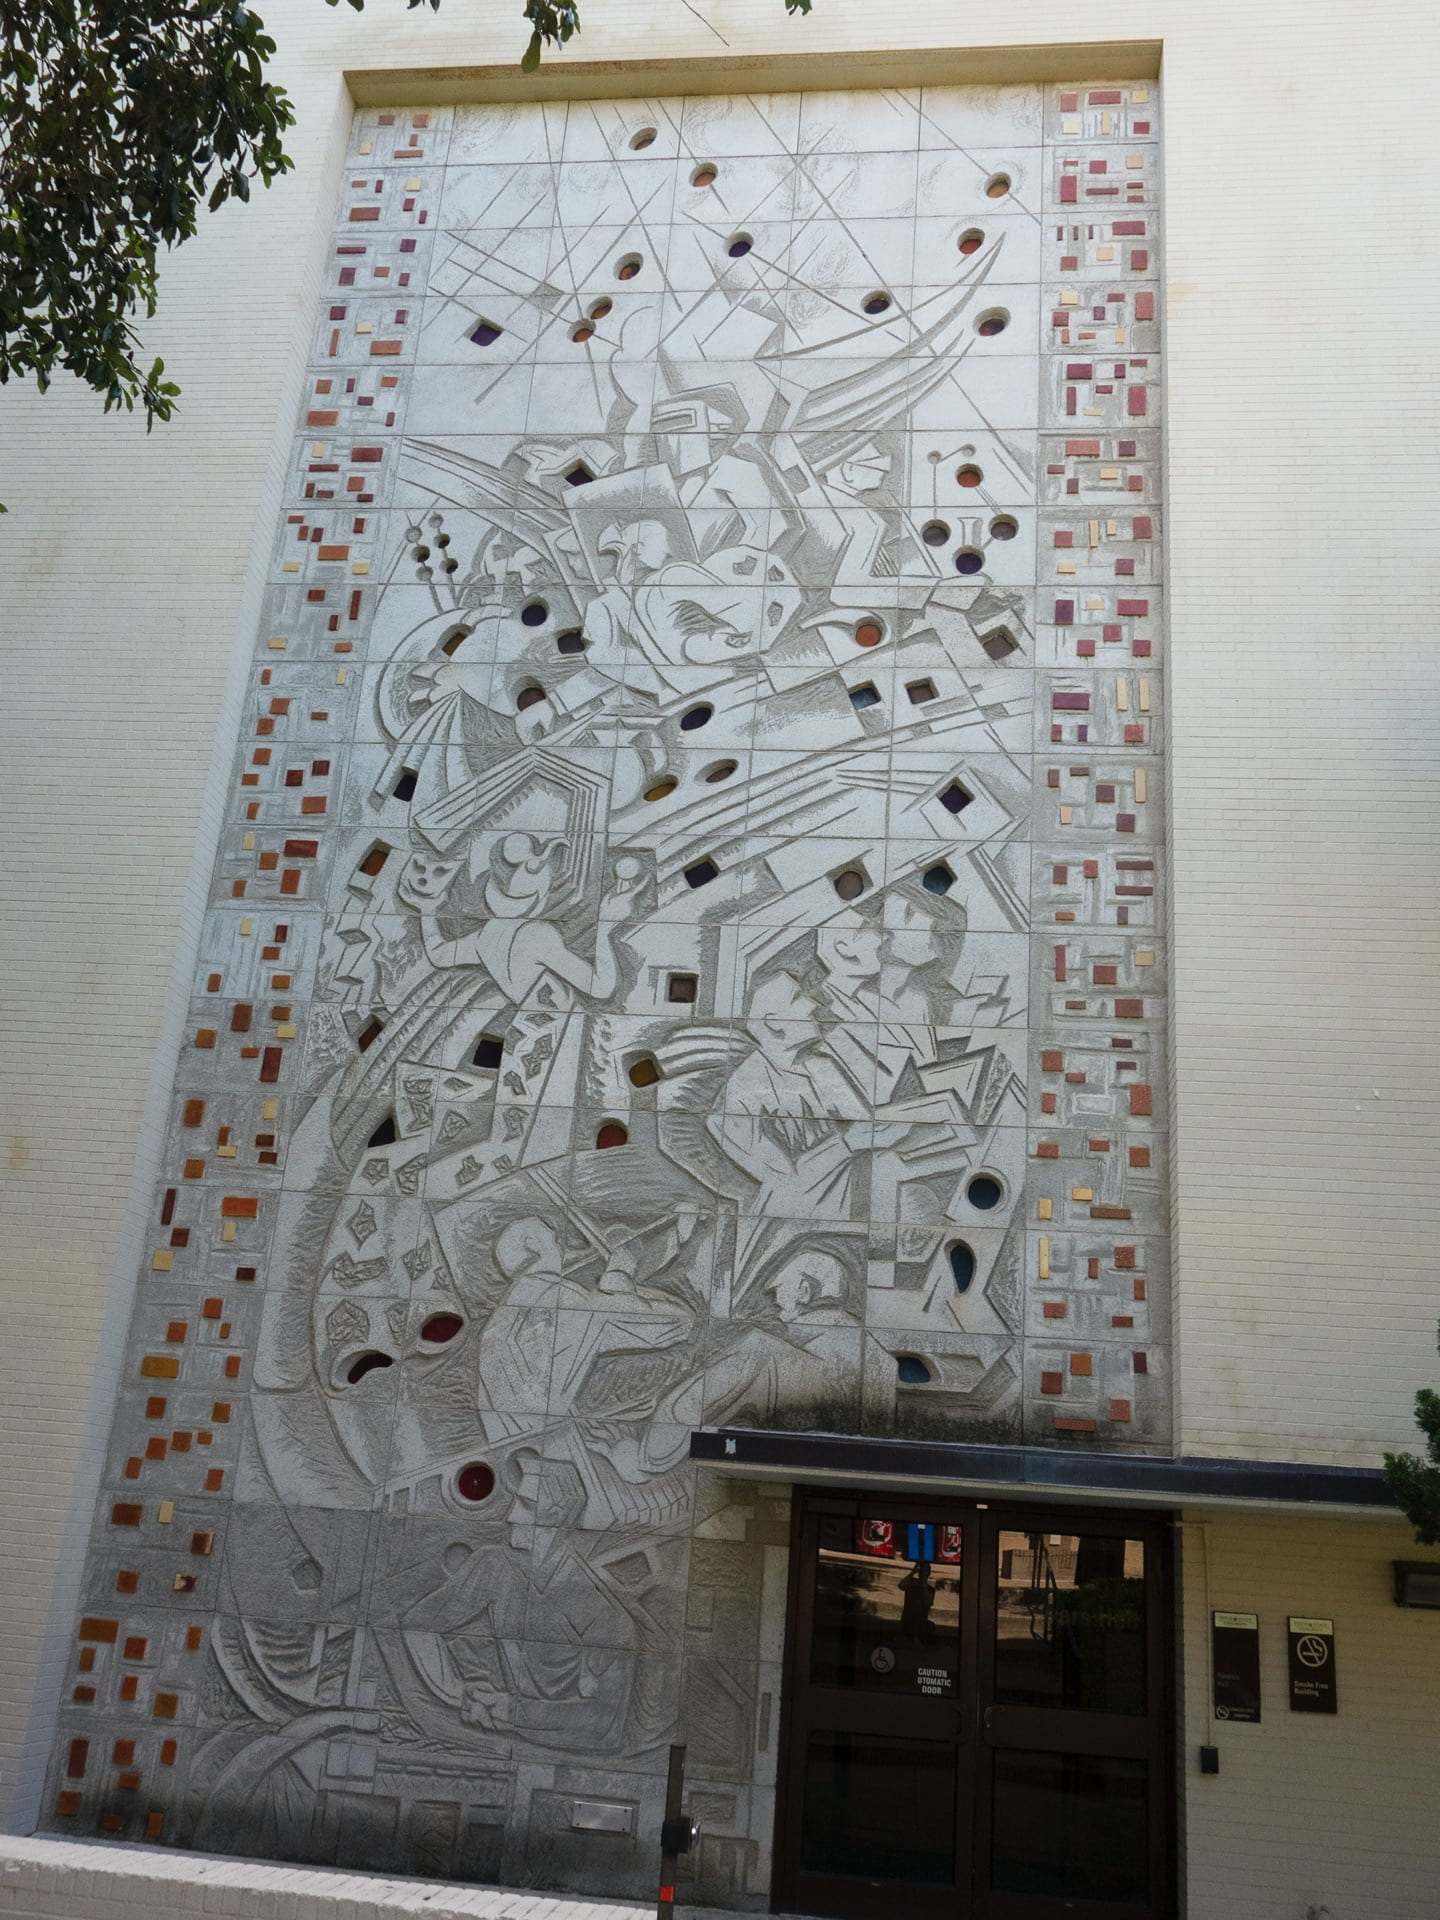
Buck Winn mural at Flowers Hall, Texas State University

Continue reading

Using a %50 Gray Layer in Photoshop in place of Dodging and Burning

Whenever we receive a request for a printed photograph or custom image work, Photoshop is usually our tool of choice for fine-tuning and one of the most common adjustments is selectively brightening or darkening areas of the image.  While there are multiple tools for enhancing the entire image, working only on particular sections of the image takes a little more care.  One tool, Dodge and Burn, which takes its name from the process of adding more or less light to the exposure of the print from a darkroom enlarger, uses the Brush tool to lighten or darken an area of an image. However, this tool can often lead to creating artifacts and uneven transitions within the image. Highlights can become too white and shadows become blocked up; overuse of the tool can easily lead to a loss of detail in middle tones too. For a less destructive method using a 50% gray layer in combination with the brush tool, the steps below may be followed to make adjustments similar to dodging/burning for selected areas.

We are using this image from the San Marcos Daily Record Collection (from the University Archives) to illustrate one way to make localized adjustments to an image, by lightening the dresses of the majorettes only.

SMDR Photographic Negatives Collection, [1930s][Billy Wyatt], SMDR_1930s-1_018

Continue reading