Tech Reflect is a platform for Digital & Web Services technicians to look-back on a particular project and share their experiences, thoughts, and lessons learned.
By: Zachary Johnson, Digital A/V Technician
The Civilian Conservation Corps Project (CCC) was founded in 1933, ending in 1942. It was a government-funded organization originally meant for unemployed, unmarried men between the age of 18 and 25. The age limit was eventually moved up to 28 (although most camps didn’t care if you were 16 or 17). FDR created the CCC as a part of his ‘New Deal’ in order to provide money to families that were in desperate need of cash during the great depression
The jobs done by the CCC enrollees were mostly construction, but that is not all they were known for doing. They were truckers (construction & transportation), medical staff (assistants to doctors, nurses, and dentists), hairdressers, miners in rock quarries (although they were sometimes used to help find artifacts in historically significant dig sites), and cooks (enrollees who made breakfast, lunch, and dinner), or cashiers at concession stands in the rec hall (for extra cash, not as their main/sole job). Each enrollee was paid around $27 a month, but they only received $5 and the rest was sent to their families to help them get through the depression, though the amount paid could vary from year to year. The CCC operated mostly through national parks and was run by the U.S. military, although enrollees did not have quite as many rules and responsibilities as military personnel had. As a for instance, they still had to make their beds in the morning and have them inspected, but they didn’t have to do things like saluting to the flag.
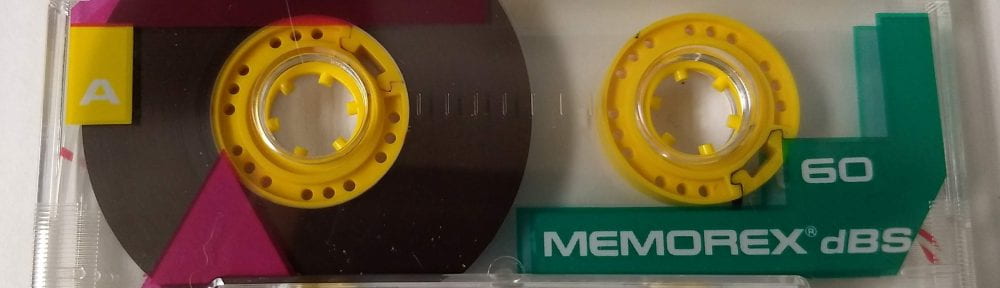
Dr. Ron Brown has approximately 42 cassette tapes of oral interviews conducted in 1991-1993 while he was working on a history of the Civilian Conservation Corps (CCC) camps in Mesa Verde National Park. The Mesa Verde site is significant because unlike most CCC sites, most of the documents and archives related to CCC remained on site and were not sent to the National Archives. Persons who were members of the CCC in Mesa Verde were interviewed for their recollections. Shortly after he completed the interviews, he became a full-time administrator and did not return to the project until Jan. 1, 2018, when he returned to full-time faculty status. The interviews were collected on cassette tapes of good quality at the time. His interview equipment was better than average quality at the time, and the interview cassettes have not been run since the early 1990s.
The tapes are historically significant documents that are important for his own research and would be of use to the Texas State Archives as well as to the MVNP Research Center in Colorado. The tapes were captured, edited, and given back to Dr. Brown in the months of October and November 2018 by Zachary Johnson. After the digital capture, the physical tapes will be given to the university archiving department at Texas State University library, while the digital copies will be transcribed and given back to Dr.Brown for his project.
How I Created Digital Files from Legacy Technology
- Check to make sure all the recording devices work properly
- Check the condition of the physical tape
- Record the audio on each side of the tape
- Edit/clean up the audio
- Turn in for Quality Control (QC)
1) Check to make sure all the recording devices work properly
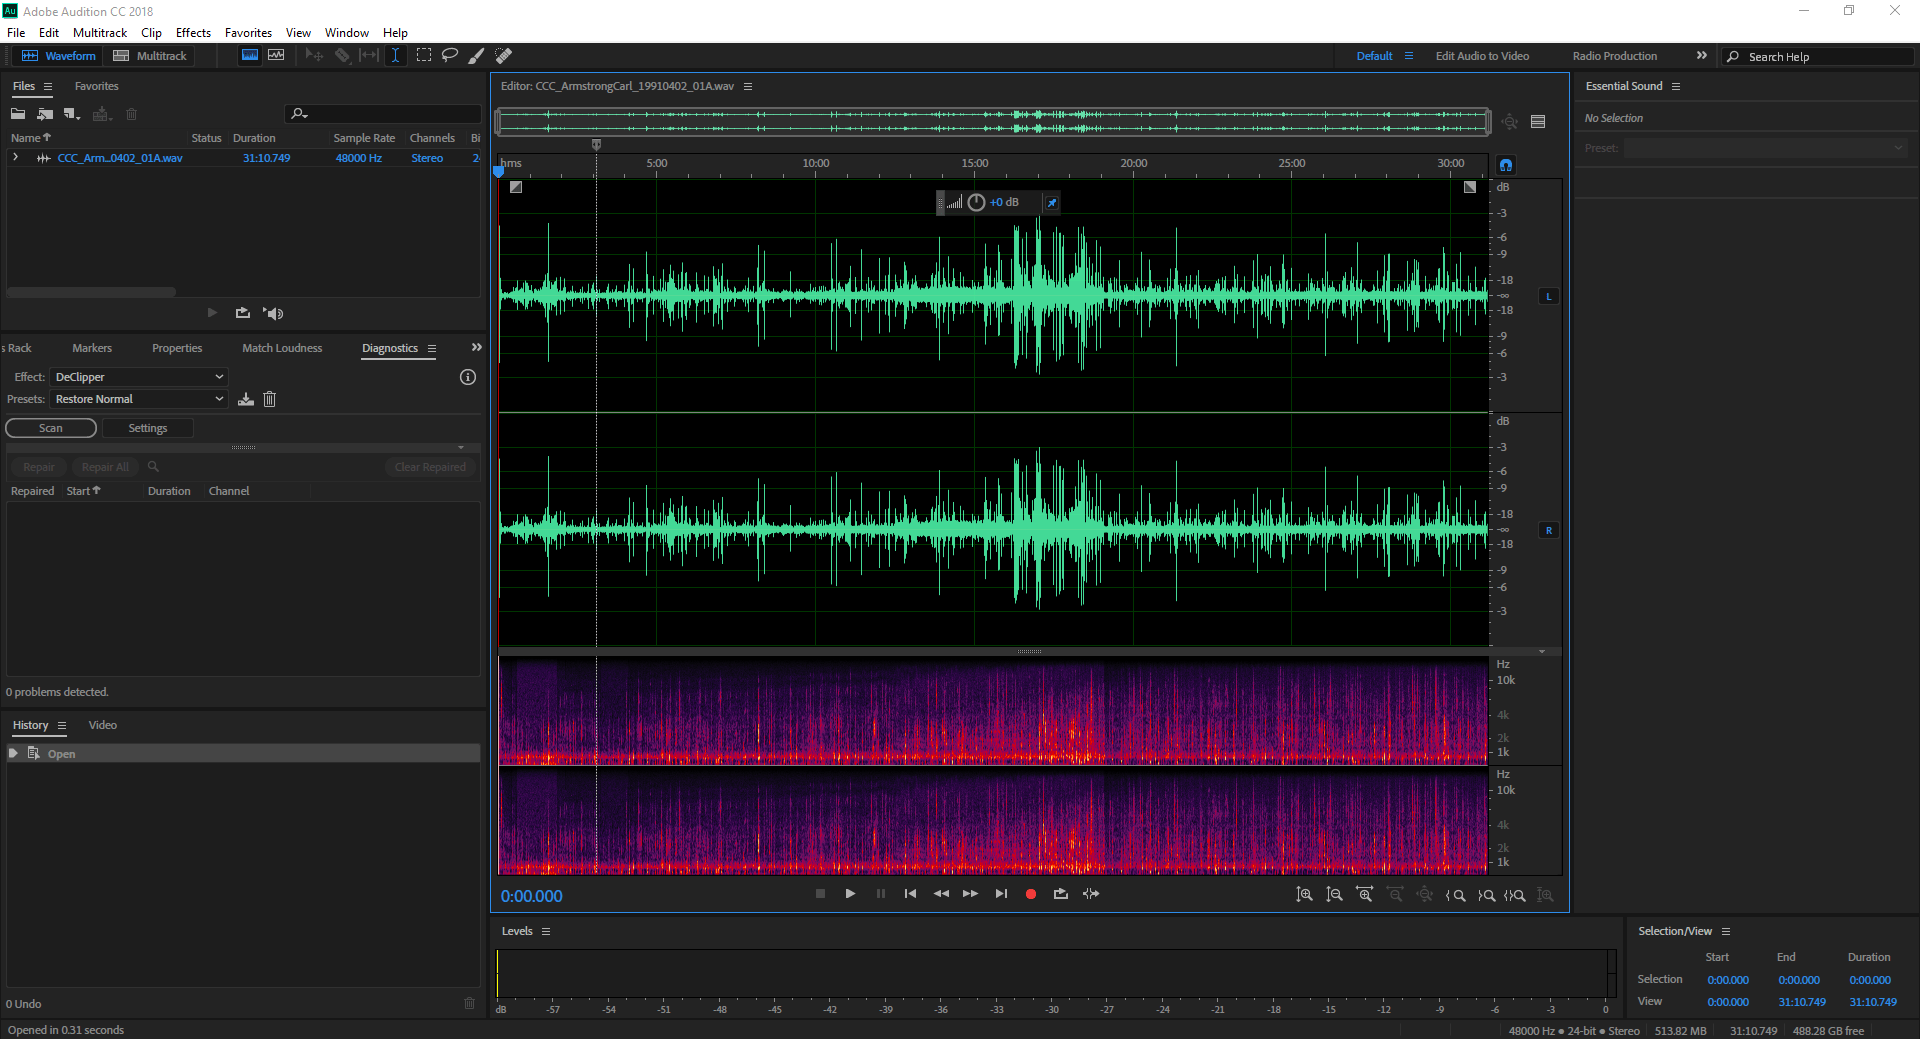
I set up all the devices and programs needed for the project using the User’s Manual written by Todd Peters. After verifying hardware settings on Audition by selecting Playback Devices. Then, I checked Connections, making sure the cassette Deck (a Nakamichi) was properly plugged into the Benchmark devices and the benchmark devices were properly plugged into the computer. The Nakamichi is plugged directly into two devices that are used to digitize the audio from the cassette so it can be used on a computer. Set the ADC1 device into its 96 KHz configuration. Before I recording the audio in Audition, listen to it while moving the gain switches found on the ADC1 to adjust the amount of sound coming through changing the initial volume that will be recorded. Finally, I check software settings on Adobe Audition CC 2018 (an audio editing software used to capture and restore/modify audio clips), which should be running properly without any issues.

ADC1 and DAC1 next to the Nakamichi MR-1 cassette deck
2) Check the condition of the physical tape
I was inspecting the cassette making sure it was not dusty, as I have to be careful in how I clean it as to not damage the film inside. A damp paper towel is usually all that I need in this situation. Second I made sure that there are no cracks in the cassette or tears in its film. If the cassette is cracked I have to check to see if it can still be used without exacerbating the damage. If the film is torn then the tape cannot be used. After making sure there are no issues with the tape I inserted it into the Nakamichi to do tape check before recording. All that I have to do at this point is thread the tape. When threading a cassette tape I fast forward through to the end and rewind it back to the beginning. This is done to make sure there are no stops in the playback, so the recording can be finished without large cuts in the audio. Lastly, I play the first couple seconds of the tape to make sure the tape has any audio on it (it doesn’t always).
3) Record the audio on each side of the tape
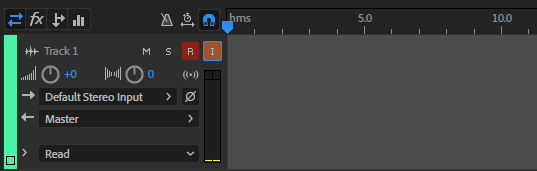
When starting the capture I press the record button in audition after toggling on the record and monitor functions on the track being used. After clicking record push play on the Nakamichi (this starts the cassette) I then listen to the tape, taking notes for editing later. After finishing the capture the recording is stopped and saved with the files exported under names given by the person commissioning the work (whether that is a supervisor or faculty member). Two files are made per capture because there are two captures per tape. One set is saved as an mp3 and the other as a .wav file.
4) Edit/Clean up the audio
The better the capture; the less work that will need to be done to correct the audio. When I begin to edit the audio file it is important for me to have saved and exported an ‘unedited’ version of the audio in case it is needed for record keeping or for a historical accurate recording. When I edit I use track one, which is automatically created after a capture is complete. Tracks are essentially copies of the capture that effects and editing tools can be used on.
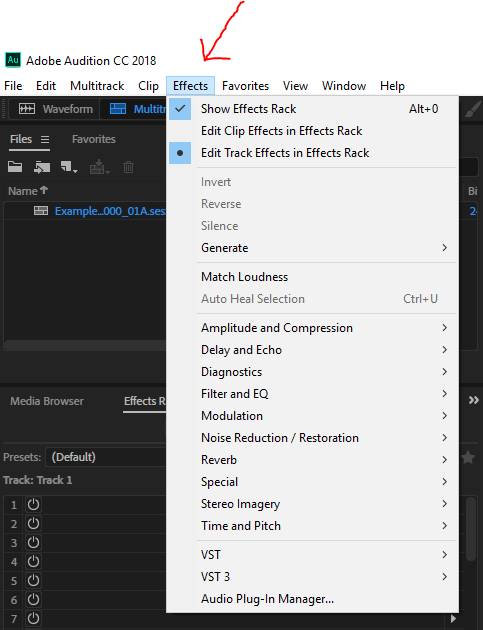
When using the select tool, I delete the portions at the beginning and end that have no vocals or audio. Going through the recording bit by bit deleting long pauses between speaking, making sure that it sounds natural. Using the effects toolbar along the top of audition to edit the audio file all at once, or I highlight specific sections of the clip to edit specific portions. One of the tools ‘De-hum’ deletes any low background whine, that might make listening to the interview difficult. The ‘De-Hiss’ does the same thing but with higher pitched sibilant sounds. Sometimes a boost in the vocals is needed, moving to the special effect tab use the ‘vocal-enhancer’ effect. Using the ‘amplify-tool’/channel-mixer’ found under the amplify tab I adjust the volume of the audio as needed. The most important effect is the ‘normalizer’ found under the amplify tab. For this project, all files had their Db function set to -3 to create a consistent loud audio throughout the audio regardless of the initial capture’s volume.
I export the files so they could be saved as audio files. Exporting is found under the file tab. Just like exporting the initial capture I save the now edited audio as mp3 and .wav files, using the same file name as the capture audio files. The sample type must be set at 96,000 Hz 16-bit before exporting the file to its proper location. After saving the mp3 and .wav to the correct folder I move it into a ‘quality control’ folder.
5) Turn in for quality control
After I place all the files into the ‘quality control’(QC) folder it is up to the individual doing QC to review the files’ readiness to be considered finished. If I am told to re-edit the audio I go back and fix any and all issues had with the file, then I give them back the newer version of the audio file(s). If there are no issues then cassette name on the spreadsheet is moved from digitization-complete to QC-complete, meaning the file is ready to be given to the person commissioning the digitization(Dr.Brown).
Conclusion
The CCC-Project was my first full introductory experience into a fully digital workflow, and I learned a lot about establishing the workflow, computer shortcuts, and Adobe Audition cc 2018. The most troublesome issue for me with this project was trying to edit the portions of the audio that could not be changed without ruining the quality of the clip as a whole. For example, making a loud set of voices in the background of an interview quieter. It could be done, but it made the audio sound distorted and the voices of Dr.Brown and the interviewee quiet and hard to understand. Looking back to the beginning of this project I can confidently say that I am proud of the work I did to restore and digitize these cassettes. I hope that Dr. Ron Brown is able to properly complete his project using the audio files I helped digitize and that the tapes he is donating to the University Archives are properly taken care of as to keep them from deteriorating any further.